#
Configuring Cloudinary
By
Jordan Handy
#
Cloudinary Configuration Steps
- Log in to Cloudinary and find your Cloud Name here

Cloudinary Dashboard - Enable Unsigned Uploads
- Obtain a Preset Name that allows unsigned uploads. This is found under "Settings -> Uploads"
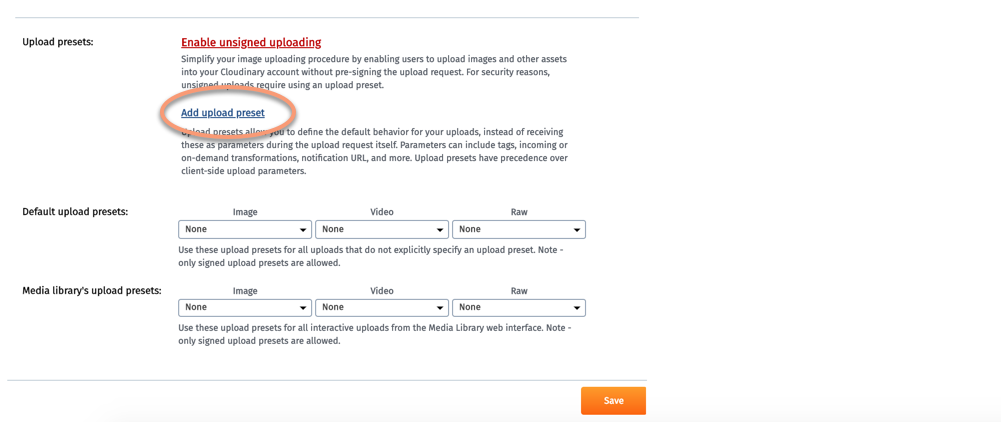
Enable Unsigned Uploads
Note
When the preset is created, it will have a "name" associated with it. Use this name in the "Upload Preset" field in Obisidan
- When configuring the upload preset folder name, you can leave this blank to have the pictures uploaded to the root of your Cloudinary Media Library. If you do put a folder name in this field, all images will be stored in a subdirectory of that name in your Media Library.
Note
If you have a folder name already configured on Cloudinary under the settings for your specific upload preset (can be configured on Cloudinary itself), this folder setting will be ignored.
#
Cloudinary and Potential Duplicate Uploads
I recommend double-checking all of your Cloudinary Upload Preset settings before you begin to use the plugin.
Continue to Plugin Commands